Friday, March 30, 2012
The Go Programming Language, version 1 is released
Go is expressive, concise, clean, and efficient. Its concurrency mechanisms make it easy to write programs that get the most out of multicore and networked machines, while its novel type system enables flexible and modular program construction. Go compiles quickly to machine code yet has the convenience of garbage collection and the power of run-time reflection. It's a fast, statically typed, compiled language that feels like a dynamically typed, interpreted language.
Go version 1, or Go 1 for short, released. It defines a language and a set of core libraries to provide a stable foundation for creating reliable products, projects, and publications. ~ The Go Programming Language Blog
Web Site: http://golang.org/
New Dart Editor build available
Dart language spec updated to 0.08, and the new Dart Editor build 5845 released with highlights:
- Copy/Paste and show libraries in bold in Files view
- Initial support for excluding files/directories from analysis
- Debugger improvements
- Analysis, Frog, and SDK fixes
Web Site: http://www.dartlang.org/
Thursday, March 29, 2012
BlackBerry PlayBook and Smartphone Simulators
Link to BlackBerry Simulators
Emulator of Firefox mobile version
Opera Mobile Emulator: desktop version of Opera’s smart phone browser
The Opera Mobile Emulator renders pages as close as you can get to how it would look on a real phone. It can be paired with Opera Dragonfly for an effective testing environment before taking it to the physical phone.
http://www.opera.com/developer/tools/mobile/
FREE multi-language code editor - Komodo Edit
http://www.activestate.com/komodo-edit

Wednesday, March 28, 2012
Easy to embed Google Maps with Panoramio photos
<!DOCTYPE html>
<html>
  <head>
    <title>Google Maps JavaScript API v3 Example: Panoramio Layer</title>
    <meta name="viewport" content="initial-scale=1.0, user-scalable=no">
    <meta charset="UTF-8">
    <link href="/maps/documentation/javascript/examples/default.css"
      rel="stylesheet" type="text/css">
    <style type="text/css">
      #photo-panel {
        background: #fff;
        padding: 5px;
        overflow-y: auto;
        overflow-x: hidden;
        width: 300px;
        max-height: 300px;
        font-size: 14px;
        font-family: Arial;
        border: 1px solid #ccc;
        box-shadow: -2px 2px 2px rgba(33, 33, 33, 0.4);
        display: none;
      }
    </style>
    <script type="text/javascript"
      src="//maps.googleapis.com/maps/api/js?sensor=false&libraries=panoramio"></script>
    <script type="text/javascript">
      function initialize() {
        var myOptions = {
          zoom: 16,
          center: new google.maps.LatLng(47.651743, -122.349243),
          mapTypeId: google.maps.MapTypeId.ROADMAP
        };

        var map = new google.maps.Map(document.getElementById('map_canvas'),
            myOptions);

        var panoramioLayer = new google.maps.panoramio.PanoramioLayer();
        panoramioLayer.setMap(map);

        var photoPanel = document.getElementById('photo-panel');
        map.controls[google.maps.ControlPosition.RIGHT_TOP].push(photoPanel);

        google.maps.event.addListener(panoramioLayer, 'click', function(photo) {
          var li = document.createElement('li');
          var link = document.createElement('a');
          link.innerHTML = photo.featureDetails.title + ': ' +
              photo.featureDetails.author;
          link.setAttribute('href', photo.featureDetails.url);
          li.appendChild(link);
          photoPanel.appendChild(li);
          photoPanel.style.display = 'block';
        });
      }

      google.maps.event.addDomListener(window, 'load', initialize);
    </script>
  </head>
  <body>
    <ul id="photo-panel">
      <li><strong>Photos clicked</strong></li>
    </ul>
    <div id="map_canvas"></div>
  </body>
</html>
Google Weather Map JavaScript
<!--
You are free to copy and use this sample in accordance with the terms of the
Apache license (http://www.apache.org/licenses/LICENSE-2.0.html)
-->

<!DOCTYPE html PUBLIC "-//W3C//DTD XHTML 1.0 Strict//EN" "http://www.w3.org/TR/xhtml1/DTD/xhtml1-strict.dtd">
<html xmlns="http://www.w3.org/1999/xhtml" xmlns:v="urn:schemas-microsoft-com:vml">
  <head>
    <meta http-equiv="content-type" content="text/html; charset=utf-8"/>
    <title>Google Maps API Sample</title>
    <script src="http://maps.google.com/maps?file=api&v=2&sensor=false&key=ABQIAAAAuPsJpk3MBtDpJ4G8cqBnjRRaGTYH6UMl8mADNa0YKuWNNa8VNxQCzVBXTx2DYyXGsTOxpWhvIG7Djw" type="text/javascript"></script>
    <script src="http://gmaps-utility-library.googlecode.com/svn/trunk/markermanager/release/src/markermanager.js"></script>
    <script type="text/javascript">

    var IMAGES = [ "sun", "rain", "snow", "storm" ];
    var ICONS = [];
    var map = null;
    var mgr = null;

    function setupMap() {
      if (GBrowserIsCompatible()) {
        map = new GMap2(document.getElementById("map"));
        map.addControl(new GLargeMapControl());
        map.setCenter(new GLatLng(48.25, 11.00), 4);
        map.enableDoubleClickZoom();
        window.setTimeout(setupWeatherMarkers, 0);
      }
    }

    function getWeatherIcon() {
      var i = Math.floor(IMAGES.length*Math.random());
      if (!ICONS[i]) {
        var icon = new GIcon();
        icon.image = "http://gmaps-utility-library.googlecode.com/svn/trunk/markermanager/release/examples/images/"
            + IMAGES[i] + ".png";
        icon.iconAnchor = new GPoint(16, 16);
        icon.infoWindowAnchor = new GPoint(16, 0);
        icon.iconSize = new GSize(32, 32);
        icon.shadow = "http://gmaps-utility-library.googlecode.com/svn/trunk/markermanager/release/examples/images/"
            + IMAGES[i] + "-shadow.png";
        icon.shadowSize = new GSize(59, 32);
        ICONS[i] = icon;
      }
      return ICONS[i];
    }

    function getRandomPoint() {
      var lat = 48.25 + (Math.random() - 0.5)*14.5;
      var lng = 11.00 + (Math.random() - 0.5)*36.0;
      return new GLatLng(Math.round(lat*10)/10, Math.round(lng*10)/10);
    }

    function getWeatherMarkers(n) {
      var batch = [];
      for (var i = 0; i < n; ++i) {
        batch.push(new GMarker(getRandomPoint(), { icon: getWeatherIcon() }));
      }
      return batch;
    }

    function setupWeatherMarkers() {
      mgr = new MarkerManager(map);
      mgr.addMarkers(getWeatherMarkers(20), 3);
      mgr.addMarkers(getWeatherMarkers(200), 6);
      mgr.addMarkers(getWeatherMarkers(1000), 8);
      mgr.refresh();
    }

    </script>
  </head>
  <body onload="setupMap()" onunload="GUnload()" style="font-family: Arial;border: 0 none;">
    <div id="map" style="margin: 5px auto; width: 650px; height: 400px"></div>
    <div style="text-align: center; font-size: large;">
      Random Weather Map
    </div>
</body>
</html>
Tuesday, March 27, 2012
Javascript query Yahoo! Weather by zip
<html>
<head>
<meta charset="UTF-8">
<title>Mobile-Web-App: Yahoo! Weather by zip</title>

<script>

function loadyahooweather()
{
 if (window.XMLHttpRequest)
 { // code for IE7+, Firefox, Chrome, Opera, Safari
  xmlhttp=new XMLHttpRequest();
 } else {
  // code for IE6, IE5
  xmlhttp=new ActiveXObject("Microsoft.XMLHTTP");
 }

 xmlhttp.open("GET","http://query.yahooapis.com/v1/public/yql/jonathan/weather?zip=94025",false);
 xmlhttp.send();
 xmlDoc=xmlhttp.responseXML;

 //description=xmlDoc.getElementsByTagName("description");


 description0=(xmlDoc.getElementsByTagName("description")[0].childNodes[0].nodeValue);
 description1=(xmlDoc.getElementsByTagName("description")[1].childNodes[0].nodeValue);

 txt = "<p><b>" + description0 + "</b></p>";
 txt += "<p>" + description1 + "</p>";

 //txt = "<p>title: " + "</p>";

 document.getElementById("yahooweather").innerHTML=txt;
}
</script>
</head>
<body onload="loadyahooweather()">
<h1>Mobile-Web-App: Yahoo! Weather by zip</h1>
<div id='yahooweather'></div>

</body>
</html>
Monday, March 26, 2012
Parse XML using Javascript
http://query.yahooapis.com/v1/public/yql?q=select*from%20geo.places%20where%20text=%22New%20York%22&format=xml
We can use JavaScript to parse the xml to retrieve information; such as WOEID, placeTypeName, name and much more. The example display WOEID, placeTypeName, name of the first place in the returned list.
<html>
<head>
<meta charset="UTF-8">
<title>Mobile-Web-App: XML Parse</title>

<script>

function loadwoeid()
{
 if (window.XMLHttpRequest)
 { // code for IE7+, Firefox, Chrome, Opera, Safari
  xmlhttp=new XMLHttpRequest();
 } else {
  // code for IE6, IE5
  xmlhttp=new ActiveXObject("Microsoft.XMLHTTP");
 }

 xmlhttp.open("GET","http://query.yahooapis.com/v1/public/yql?q=select*from%20geo.places%20where%20text=%22New%20York%22&format=xml",false);
 xmlhttp.send();
 xmlDoc=xmlhttp.responseXML;

 place=xmlDoc.getElementsByTagName("place");
 firstplace = place[0];

 woeid=(firstplace.getElementsByTagName("woeid")[0].childNodes[0].nodeValue);
 placetypename=(firstplace.getElementsByTagName("placeTypeName")[0].childNodes[0].nodeValue);
 name=(firstplace.getElementsByTagName("name")[0].childNodes[0].nodeValue);

 txt = "<p>WOEID: " + woeid + "</p>"
   + "<p>placeTypeName: " + placetypename + "</p>"
   + "<p>name: "+ name +"</p>";

 document.getElementById("woeidtable").innerHTML=txt;
}
</script>
</head>
<body onload="loadwoeid()">
<h1>Mobile-Web-App: XML Parse</h1>
<div id='woeidtable'></div>

</body>
</html>
WebKit For Dummies
Get up to speed on the engine that powers Safari and Google Chrome
- Explains how to create web pages for both mobile and desktop display using WebKit
- Covers acquiring and installing the developer tools, building web pages, debugging and deploying them, and taking advantage of WebKit functions to create faster, more appealing, and more interactive sites
Saturday, March 24, 2012
Simple example of Raphaël JavaScript library
<!doctype html>
<html>
<head>
<meta charset="UTF-8">
<title>Mobile-Web-App: Raphaël</title>

<script src="http://raphaeljs.com/raphael.js"></script>
<script>
var paper_w = 500;
var paper_h = 300;
window.onload = function () {
 var paper = Raphael("RaphaelPaper", paper_w, paper_h);
 paper.rect(0, 0, paper_w, paper_h, 20).attr({fill: "#333"});
 };
</script>

</head>
<body>
<h1>Mobile-Web-App: Raphaël</h1>
<div id="RaphaelPaper"/>

</body>
</html>
Raphaël is a small JavaScript library that should simplify your work with vector graphics on the web.
Thursday, March 22, 2012
Raphaël—JavaScript Library
 Raphaël is a small JavaScript library that should simplify your work with vector graphics on the web. If you want to create your own specific chart or image crop and rotate widget, for example, you can achieve it simply and easily with this library.
Raphaël ['ræfeɪəl] uses the SVG W3C Recommendation and VML as a base for creating graphics. This means every graphical object you create is also a DOM object, so you can attach JavaScript event handlers or modify them later. Raphaël’s goal is to provide an adapter that will make drawing vector art compatible cross-browser and easy.
Raphaël currently supports Firefox 3.0+, Safari 3.0+, Chrome 5.0+, Opera 9.5+ and Internet Explorer 6.0+.
Web Site: http://raphaeljs.com/
Inkscape - An Open Source SVG graphics editor

Inkscape is an Open Source vector graphics editor, with capabilities similar to Illustrator, CorelDraw, or Xara X, using the W3C standard Scalable Vector Graphics (SVG) file format.
Inkscape supports many advanced SVG features (markers, clones, alpha blending, etc.) and great care is taken in designing a streamlined interface. It is very easy to edit nodes, perform complex path operations, trace bitmaps and much more. Also aim to maintain a thriving user and developer community by using open, community-oriented development.
Web Site: http://inkscape.org/
Wednesday, March 21, 2012
Detect click event on svg objects
<!doctype html>

<html>
<head>
<meta charset="UTF-8">
<title>Mobile-Web-App: HTML5 svg</title>

</head>
<body>
<h1>Mobile-Web-App: HTML5 Scalable Vector Graphics (svg)</h1>

<svg width="400" height="300">
 <rect id="svg_background" x="0" y="0" width="400" height="300" stroke="black" stroke-width="1" fill="white" />

 <circle id="svg_circle" cx="200" cy="200" r="100" stroke="blue" stroke-width="5" fill="green"/>
 <rect id="svg_rect" x="50" y="50" width="100" height="100" stroke="red" stroke-width="5" fill="none"/>
</svg>

<script>
document.getElementById("svg_background").addEventListener("click", svg_clicked, false);
document.getElementById("svg_circle").addEventListener("click", svg_clicked, false);
document.getElementById("svg_rect").addEventListener("click", svg_clicked, false);

function svg_clicked(event)
{
 alert(event.target.id +" clicked");
}
</script>

</body>
</html>
Beginning Mobile Application Development in the Cloud
Learn how to build apps for mobile devices on Cloud platforms
- Highlights the skills and knowledge you need to create successful apps for mobile devices with HTML5
- Takes you through the steps for building web applications for the iPhone and Android
- Details how to enhance your app through faster launching, touch vs. click, storage capabilities, and a cache
- Looks at how best to use JSON, FourSquare, jQuery, AJAX, and more
- Shares tips for creating hybrid apps that run natively
Tuesday, March 20, 2012
HTML5 svg: text
<!doctype html>

<html>
<head>
<meta charset="UTF-8">
<title>Mobile-Web-App: HTML5 svg Text</title>

</head>
<body>
<h1>Mobile-Web-App: HTML5 Scalable Vector Graphics (svg)</h1>

<svg width="600" height="200">
 <rect x="0" y="0" width="600" height="200" stroke="black" stroke-width="1" fill="white" />

 <text
  x="10" y="50"
  style="font-family: sans-serif"
  font-weight="bold"
  stroke="black"
  stroke-width="2"
  fill="#f00"
  font-size="30px">Mobile-Web-App: HTML5 svg Text</text>

</svg>


</body>
</html>
Monday, March 19, 2012
HTML5 svg: path
- d stand for data
- M: moveto
- L: lineto
- Q: quadratic curve
- Z: close path
<!doctype html>

<html>
<head>
<meta charset="UTF-8">
<title>Mobile-Web-App: HTML5 svg LinearGradient</title>

</head>
<body>
<h1>Mobile-Web-App: HTML5 Scalable Vector Graphics (svg)</h1>

<svg width="400" height="300">
 <rect x="0" y="0" width="400" height="300" stroke="black" stroke-width="1" fill="white" />

 <def>
 <path d="M50, 50
    L100, 50
    L100, 100
    L50, 100 Z" id="path1" fill="green"></path>
 </def>

 <use xlink:href="#path1"
   fill="none"
   stroke="#ff0000"
   stroke-linejoin="round"
   stroke-width="5px"/>

 <path d="M100, 150
    L350, 150
    L350, 250
    L100, 250" id="path2" fill="blue" stroke="#000000" stroke-width="10px"></path>

 <path d="M200, 0
    L200, 50
    Q250, 50, 300, 100
    Q350, 100, 350, 0 Z"
    fill="red" stroke="#000000" stroke-width="5px"></path>

</svg>

</body>
</html>
Saturday, March 17, 2012
FREE eBook: “Mobile Design and Development” by Brian Fling for free online
Mobile Design and Development fills that void with practical guidelines, standards, techniques, and best practices for building mobile products from start to finish. With this book, you’ll learn basic design and development principles for all mobile devices and platforms.
- A Brief History of Mobile
- The Mobile Ecosystem
- Why Mobile?
- Designing for Context
- Developing a Mobile Strategy
- Types of Mobile Applications
- Mobile Information Architecture
- Mobile Design
- Mobile Web Apps Versus Native Applications
- Mobile 2.0
- Mobile Web Development
- iPhone Web Apps
- Adapting to Devices
- Making Money in Mobile
- Supporting Devices
- The Future of Mobile
Friday, March 16, 2012
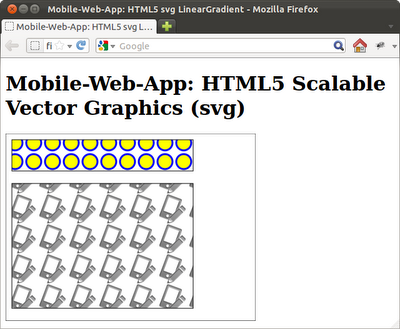
HTML5 svg: pattern
<!doctype html>

<html>
<head>
<meta charset="UTF-8">
<title>Mobile-Web-App: HTML5 svg LinearGradient</title>

</head>
<body>
<h1>Mobile-Web-App: HTML5 Scalable Vector Graphics (svg)</h1>

<svg width="400" height="300">
 <rect x="0" y="0" width="400" height="300" stroke="black" stroke-width="1" fill="white" />

 <defs>
  <pattern id="mypattern1" x="0" y="0" width="30" height="30" viewBox="0 0 30 30" patternUnits="userSpaceOnUse">
   <circle cx="15" cy="15" r="12" stroke="blue" stroke-width="3" fill="yellow"/>
  </pattern>

  <pattern id="mypattern2" x="0" y="0" width="48" height="48" viewBox="0 0 48 48" patternUnits="userSpaceOnUse">
   <image x="0" y="0" width="48" height="48" xlink:href="Mobile-Web-App.png" ></image>
  </pattern>
 </defs>

 <rect x="10" y="10" width="290" height="50" stroke="black" fill="url(#mypattern1)"/>
 <rect x="10" y="80" width="290" height="200" stroke="black" fill="url(#mypattern2)"/>

</svg>

</body>
</html>
HTML5 svg: radialGradient vs linearGradient
<!doctype html>

<html>
<head>
<meta charset="UTF-8">
<title>Mobile-Web-App: HTML5 svg LinearGradient</title>

</head>
<body>
<h1>Mobile-Web-App: HTML5 Scalable Vector Graphics (svg)</h1>

<svg width="400" height="300">
 <rect x="0" y="0" width="400" height="300" stroke="black" stroke-width="1" fill="white" />

 <defs>
  <linearGradient id="horizontallineargradient"  x1="0%" y1="0%" x2="100%" y2="0%">
   <stop offset="0%" stop-color="#0ff"></stop>
   <stop offset="100%" stop-color="#f00"></stop>
  </linearGradient>

  <radialGradient id="radialgradient" cx="50%" cy="50%" r="50%" fx="50%" fy="50%">
   <stop offset="0%" style="stop-color:rgb(255,0,0)"/>
   <stop offset="100%" style="stop-color:rgb(0,0,255)"/>
      </radialGradient>
 </defs>

 <rect x="10" y="10" width="290" height="50" stroke="black" fill="url(#horizontallineargradient)"/>
 <rect x="10" y="80" width="290" height="200" stroke="black" fill="url(#radialgradient)"/>
</svg>

</body>
</html>
Related:
- HTML5 svg: LinearGradient - Horizontal vs Vertical
Thursday, March 15, 2012
HTML5 svg: LinearGradient
<!doctype html>

<html>
<head>
<meta charset="UTF-8">
<title>Mobile-Web-App: HTML5 svg LinearGradient</title>

</head>
<body>
<h1>Mobile-Web-App: HTML5 Scalable Vector Graphics (svg)</h1>

<svg width="400" height="300">
 <rect x="0" y="0" width="400" height="300" stroke="black" stroke-width="1" fill="white" />

 <defs>
  <LinearGradient id="horizontallineargradient"  x1="0%" y1="0%" x2="100%" y2="0%">
   <stop offset="0%" stop-color="#0ff"></stop>
   <stop offset="100%" stop-color="#f00"></stop>
  </LinearGradient>

  <LinearGradient id="verticallineargradient"  x1="0%" y1="0%" x2="0%" y2="100%">
   <stop offset="0%" stop-color="red"></stop>
   <stop offset="100%" stop-color="blue"></stop>
  </LinearGradient>
 </defs>

 <rect x="10" y="10" width="290" height="50" stroke="black" fill="url(#horizontallineargradient)"/>
 <rect x="10" y="80" width="290" height="200" stroke="black" fill="url(#verticallineargradient)"/>
</svg>

</body>
</html>
Related: - HTML5 svg: radialGradient vs linearGradient
HTML5 svg: reuse group
<!doctype html>

<html>
<head>
<meta charset="UTF-8">
<title>Mobile-Web-App: HTML5 svg</title>

</head>
<body>
<h1>Mobile-Web-App: HTML5 Scalable Vector Graphics (svg)</h1>

<svg width="400" height="300">
 <rect x="0" y="0" width="400" height="300" stroke="black" stroke-width="1" fill="white" />

 <defs>
  <g id="svggroup">
   <rect x="0" y="0" width="100" height="100" stroke="red" stroke-width="5" fill="none"/>
   <circle cx="50" cy="50" r="50" stroke="blue" stroke-width="5" fill="none"/>
  </g>
 </defs>

 <use xlink:href="#svggroup"/>
 <use xlink:href="#svggroup" transform="translate(100, 100) rotate(-10) scale(1.5)"/>

</svg>

</body>
</html>
HTML5 svg, group with transform
<!doctype html>

<html>
<head>
<meta charset="UTF-8">
<title>Mobile-Web-App: HTML5 svg</title>

</head>
<body>
<h1>Mobile-Web-App: HTML5 Scalable Vector Graphics (svg)</h1>

<svg width="400" height="300">
 <rect x="0" y="0" width="400" height="300" stroke="black" stroke-width="1" fill="white" />

 <g id="svggroup" transform="translate(100, 100) rotate(-10) scale(1.5)">
  <rect x="0" y="0" width="100" height="100" stroke="red" stroke-width="5" fill="none"/>
  <circle cx="50" cy="50" r="50" stroke="blue" stroke-width="5" fill="none"/>
 </g>
</svg>

</body>
</html>
Create and link external svg image from HTML5
<svg width="400" height="300"
 xmlns="http://www.w3.org/2000/svg"
 xmlns:xlink="http://www.w3.org/1999/xlink">
<rect x="50" y="50" width="300" height="200" stroke="red" stroke-width="5" fill="#00f" />
<rect x="100" y="100" width="200" height="100" stroke="green" stroke-width="5" fill="#555" />
<rect x="25" y="25" width="50" height="50" stroke="#000" stroke-width="5" fill="none"/>
<rect x="75" y="75" width="50" height="50" stroke="#fff" stroke-width="5" fill="none"/>
</svg>
To link to external svg file using <img> as normal.
<!doctype html>

<html>
<head>
<meta charset="UTF-8">
<title>Mobile-Web-App: HTML5 svg</title>

</head>
<body>
<h1>Mobile-Web-App: HTML5 Scalable Vector Graphics (svg)</h1>
<p>Link svg from external file.</p>
<img src="mysvg.svg"></img>

</body>
</html>
Wednesday, March 14, 2012
Embed Scalable Vector Graphics(svg) in HTML5
<!doctype html>

<html>
<head>
<meta charset="UTF-8">
<title>Mobile-Web-App: HTML5 svg</title>

</head>
<body>
<h1>Mobile-Web-App: HTML5 Scalable Vector Graphics (svg)</h1>

<svg width="400" height="300">
<rect x="50" y="50" width="300" height="200" stroke="red" stroke-width="5" fill="#00f" />
<rect x="100" y="100" width="200" height="100" stroke="green" stroke-width="5" fill="#555" />
<rect x="25" y="25" width="50" height="50" stroke="#000" stroke-width="5" fill="none"/>
<rect x="75" y="75" width="50" height="50" stroke="#fff" stroke-width="5" fill="none"/>
</svg>

</body>
</html>
Related: - Create and link external svg image from HTML5
The jqMobi and jqUi official 1.0 released
- jqMobi is a lightweight query selector library for mobile devices. It comes with over 60 api calls and jQuery compatible syntax.
- jqUi is the only Ui/UX framework to work great cross platform. It fully embraces android 2.2+ (including 3.x) and offer features like fixed headers/footers, scrolling and widgets.
Tuesday, March 13, 2012
HTML5 fieldset and legend
Example:
<!DOCTYPE html>
<html>
<head>
<meta charset="UTF-8">
<title>Mobile-Web-App: HTML5 fieldset and legend</title>

</head>
<body>
<h1>Mobile-Web-App: HTML5 fieldset and legend</h1>
<form>
<fieldset>
<legend>HTML5 fieldset and legend</legend>
<p><input type="range" max="10" min="0" value="5"/></P>
<p><button>Button</button></p>
<p><button>Button</button></p>
</fieldset>
</form>

</body>
</html>
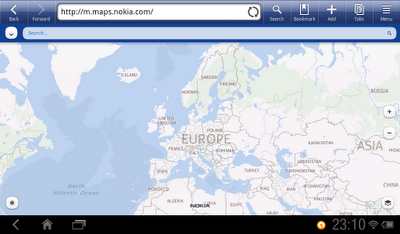
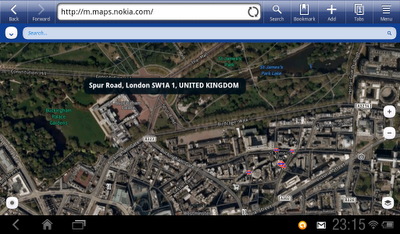
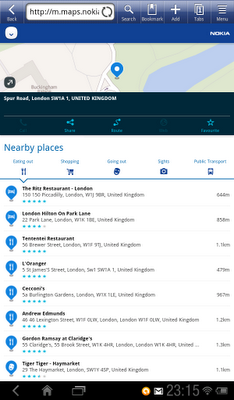
Nokia Maps for mobile web
supported device -
- Mobile Devices:
- iOS 4.3+ (mobile Safari)
- Android 2.2, 2.3
- Blackberry 6.0+ (experimental) - Desktop:
- Safari
- Chrome
What’s inside?
- Voice guidance for walk navigation
- Fast, easy to use maps for exploring neighbourhoods and more
- Loads of useful information for discovering places nearby and far away
- Opinions and reviews from others to help you get a feel for a place
- Highlights and tips from popular travel guides
- Image galleries so you can enjoy a visual preview of a place
- Easy place sharing through SMS, Facebook, Twitter or email
- Clear and accurate walking and driving routes
- “Save your Favourites” feature so you can take places with you
- View your position on the map to explore what's nearby
Details: http://betalabs.nokia.com/apps/nokia-maps-for-mobile-web
Monday, March 12, 2012
HTML5: input with datalist
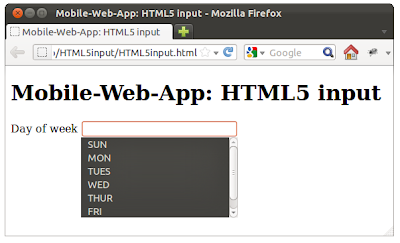
Example of input with datalist
<!DOCTYPE html>
<html>
<head>
<meta charset="UTF-8">
<title>Mobile-Web-App: HTML5 input</title>

</head>
<body>
<h1>Mobile-Web-App: HTML5 input</h1>

<datalist id="weekday">
 <option value="Sunday" label="SUN">
 <option value="Monday" label="MON"/>
 <option value="Tuesday" label="TUES"/>
 <option value="Wednesday" label="WED"/>
 <option value="Thursday" label="THUR"/>
 <option value="Friday" label="FRI"/>
 <option value="Saturday" label="SAT"/>
</datalist>

<label for="dayofweek">Day of week</label>
<input id="dayofweek" list="weekday"></input>

</body>
</html>
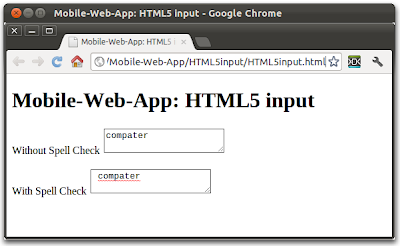
textarea with spell check
<!DOCTYPE html>
<html>
<head>
<meta charset="UTF-8">
<title>Mobile-Web-App: HTML5 input</title>

</head>
<body>
<h1>Mobile-Web-App: HTML5 input</h1>

<p>
<label for="nospellcheck">Without Spell Check</label>
<textarea id="nospellcheck" spellcheck="false"></textarea>
</p>
<p>
<label for="withspellcheck">With Spell Check</label>
<textarea id="withspellcheck" spellcheck="true"> </textarea>
</p>

</body>
</html>
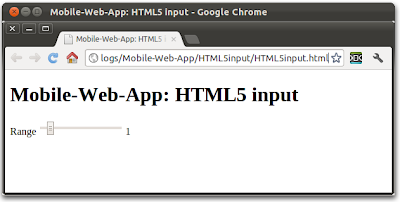
Easy display value of slider in HTML5
(Not all browser supper slider input currently!)
<!DOCTYPE html>
<html>
<head>
<meta charset="UTF-8">
<title>Mobile-Web-App: HTML5 input</title>

</head>
<body>
<h1>Mobile-Web-App: HTML5 input</h1>

<label for="rangeinput">Range</label>
<input id="rangeinput" type="range" min="0" max="10" value="5" onchange="rangevalue.value=value"></input>
<output id="rangevalue">5</output>

</body>
</html>
Sunday, March 11, 2012
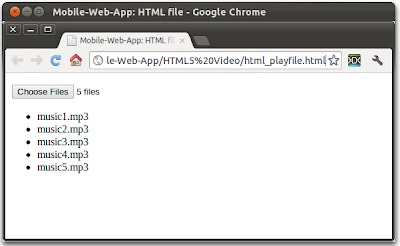
HTML/Javascript: input to load multiple file
<!DOCTYPE html>
<html lang="en">
<head>
 <meta charset="utf-8">
 <title>Mobile-Web-App: HTML file</title>

<script>
function fileSelected(filelist){

 var ulist = document.getElementById("unorderedlist");

 for(var i = 0; i < filelist.size; i++){
  var li = document.createElement("li");
  li.innerHTML = filelist.files[i].name;
  ulist.appendChild(li);
 }

}
</script>

</head>
<body>

<p>
<input id="fileinput" type="file" name="filechooser" size="10" accept="audio/*" multiple onchange="fileSelected(this)"></input>
</p>
<p>
<ul id="unorderedlist"></ul>
</p>

</body>
</html>
Saturday, March 10, 2012
Introducing HTML5 Game Development
Making video games is hard work that requires technical skills, a lot of planning, and—most critically—a commitment to completing the project. With this hands-on guide, you’ll learn step-by-step how to create a real 2D game from start to finish. In the process, you’ll use Impact, the JavaScript game framework that works with HTML5’s Canvas element.
Not only will you pick up important tips about game design, you’ll also learn how to publish Impact games to the Web, desktop, and mobile—including a method to package your game as a native iOS app. Packed with screen shots and sample code, this book is ideal for game developers of all levels.
- Set up your development environment and discover Impact’s advantages
- Build a complete game with core logic, collision detection, and player and monster behavior
- Learn why a game design document is critical before you start building
- Display and animate game artwork with sprite sheets
- Add sound effects, background music, and text
- Create screens to display stats and in-game status
- Prepare to publish by baking your game files into a single file
About the Author
For more than 13 years, Jesse Freeman has been on the cutting edge of interactive development with a focus on the Web and mobile platforms. As an expert in his field, Jesse has worked for VW, Tommy Hilfiger, Heavy, MLB, the New York Jets, HBO, and many more. Jesse was a traditional artist for most of his life until making the transition into interactive art, and he has never looked back.
Jesse is a Technical Architect/Technology Evangelist at Roundarch and is an active leader in New York's developer community. He is also active in the online community as a writer for several development sites including Adobe Developer Connection, O'Reilly Media, Inc., and Activetuts+. He can be found on twitter at @jessefreeman. Jesse also speaks at conferences and does workshops, which you can find schedules for on his website at http://jessefreeman.com.
HTML/Javscript - Create List items dynamically
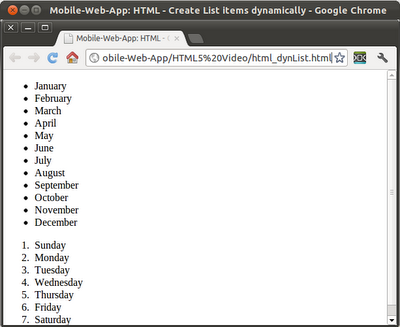
<!DOCTYPE html>
<html lang="en">
<head>
 <meta charset="utf-8">
 <title>Mobile-Web-App: HTML/Javscript - Create List items dynamically</title>

<script>

var montharray = new Array("January",
         "February",
         "March",
         "April",
         "May",
         "June",
         "July",
         "August",
         "September",
         "October",
         "November",
         "December");

var weekdayarray = new Array ("Sunday",
          "Monday",
          "Tuesday",
          "Wednesday",
          "Thursday",
          "Friday",
          "Saturday");

function onloaded(){
 var ulist = document.getElementById("unorderedlist");
 var olist = document.getElementById("orderedlist");

 //Generate list items for <ul>
 for (var i = 0; i < montharray.length; i++) {
  var li = document.createElement("li");
  li.innerHTML = montharray[i];
  ulist.appendChild(li);
 }

 //Generate list items for <ol>
 for (var i = 0; i < weekdayarray.length; i++) {
  var li = document.createElement("li");
  li.innerHTML = weekdayarray[i];
  olist.appendChild(li);
 }
}
</script>

</head>
<body onload="onloaded()">

<ul id="unorderedlist"></ul>
<ol id="orderedlist"></ol>

</body>
</html>
Related: - jQuery Mobile - Create List items dynamically
Friday, March 9, 2012
HTML/Javascript: load and play local mp3 on web page
<!DOCTYPE html>
<html lang="en">
<head>
 <meta charset="utf-8">
 <title>Mobile-Web-App: HTML file</title>

<script>
function fileSelected(filelist){

 var fileinfo =
  "<p>File name: " + filelist.files[0].name + "</p>" +
  "<p>File size: " + filelist.files[0].size + "</p>" +
  "<p>File type: " + filelist.files[0].type + "</p>";

    document.getElementById("result").innerHTML = fileinfo;
    document.getElementById("audiosource").setAttribute("src", filelist.files[0].name);
}
</script>

</head>
<body>

<p>
<audio controls="controls" id="audiosource">
  <source type="audio/mp3"  />
Your browser does not support the audio element.
</audio>
</p>
<p>
<input id="fileinput" type="file" name="filechooser" size="10" accept="audio/*" onchange="fileSelected(this)"></input>
</p>
<p id="result"></p>

</body>
</html>
Thursday, March 8, 2012
HTML/Javascript: Retrieve file info from input of file type
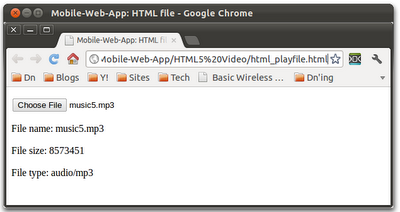
<!DOCTYPE html>
<html lang="en">
<head>
 <meta charset="utf-8">
 <title>Mobile-Web-App: HTML file</title>

<script>
function fileSelected(filelist){
 var fileinfo =
  "<p>File name: " + filelist.files[0].name + "</p>" +
  "<p>File size: " + filelist.files[0].size + "</p>" +
  "<p>File type: " + filelist.files[0].type + "</p>";

  document.getElementById("result").innerHTML = fileinfo;
}
</script>

</head>
<body>


<p>
<input id="fileinput" type="file" name="filechooser" size="10" accept="audio/*" onchange="fileSelected(this)"></input>
</p>
<p id="result"></p>

</body>
</html>
HTML file chooser with accept type
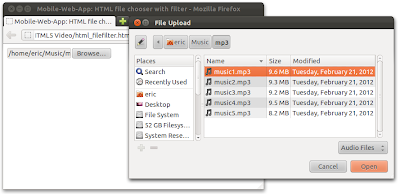
<!DOCTYPE html>
<html lang="en">
<head>
 <meta charset="utf-8">
 <title>Mobile-Web-App: HTML file chooser with filter</title>

</head>
<body>

<input type="file" name="filechooser" size="10" accept="audio/*"></input>

</body>
</html>
Next:
- HTML/Javascript: Retrieve file info from input of file type
HTML file chooser
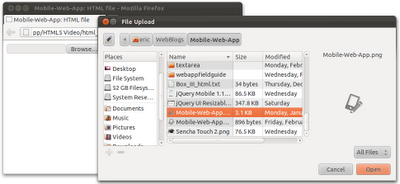
<!DOCTYPE html>
<html lang="en">
<head>
 <meta charset="utf-8">
 <title>Mobile-Web-App: HTML file</title>
</head>
<body>

<input type="file" name="filechooser" size="10"></input>

</body>
</html>
Next:
- HTML file chooser with accept type
- HTML/Javascript: input to load multiple file
jQuery UI: sortable list
<!DOCTYPE html>
<html>
<head>
<meta charset="UTF-8">
<title>Mobile-Web-App: jQuery UI sortable</title>
<script src="http://code.jquery.com/jquery-1.7.1.min.js"></script>
<script src="http://code.jquery.com/ui/1.8.18/jquery-ui.js"></script>

<script type="text/javascript">
$(function() {
  $( "#sortable" ).sortable();
 });

</script>
</head>
<body onload="onloaded();">
<h1>Mobile-Web-App: jQuery UI sortable</h1>

<ol id="sortable">
 <li>Sunday</li>
 <li>Monday</li>
 <li>Tuesday</li>
 <li>Wednesday</li>
 <li>Thursday</li>
 <li>Friday</li>
 <li>Saturday</li>
 <li><img src="http://goo.gl/BlQEX"></img></li>
</ol>

</body>
</html>
Wednesday, March 7, 2012
jQuery Mobile: Up and Running
Would you like to build one mobile web application that works on iPad and Kindle Fire as well as iPhone and Android smartphones? This introductory guide to jQuery Mobile shows you how. Through a series of hands-on exercises, you’ll learn the best ways to use this framework’s many interface components to build customizable, multiplatform apps. You don’t need any programming skills or previous experience with jQuery to get started.
By the time you finish this book, you’ll know how to create responsive, Ajax-based interfaces that work on a variety of smartphones and tablets, using jQuery Mobile and semantic HTML5 code.
- Understand how jQuery Mobile works with HTML5, CSS3, and JavaScript
- Work with UI components to format content and create forms, lists, navbars, and buttons
- Create dynamic content with JavaScript, Ajax, and the jQuery core framework
- Customize your entire user interface with themes and CSS3
- Enable users to install your app from the browser and work with it offline
- Distribute through app stores by packaging your creation as a native app
About the Author
Maximiliano Firtman, @firt, is a developer focused on mobile and HTML5 development. He is a trainer in mobile technologies and founder of ITMaster Professional Training. He is the author of many books, including Programming the Mobile Web (O'Reilly). He has spoken at international conferences such as OSCON, Velocity, Breaking Development, GOTO Europe, Campus Party, QCon, and Adobe en Vivo.
He has been an Adobe Community Professional since 2011 and a Nokia Developer Champion since 2006, and he has developed many mobile-related projects, such as MobileHTML5.org, MobileTinyURL.com, and iWebInspector.com. He maintains a mobile web development blog at MobileXweb.com.
He is an expert in native and HTML5 web development, including iOS, Android, PhoneGap, and jQuery technologies.
Sencha Touch 2 - a high-performance HTML5 mobile application framework

HTML5 has become the most important advance in application development in the last decade. Sencha Touch 2, a high-performance HTML5 mobile application framework, is the cornerstone of the Sencha HTML5 platform. Built for enabling world-class user experiences, Sencha Touch 2 is the only framework that enables developers to build fast and impressive apps that work on iOS, Android, BlackBerry, Kindle Fire, and more.
Web Site: http://www.sencha.com/
Sencha Touch 2 Launch from Sencha on Vimeo.
Sencha Touch 2, a high-performance HTML5 mobile application framework, is the cornerstone of the Sencha HTML5 platform. Built for enabling world-class user experiences, Sencha Touch 2 is the only framework that enables developers to build fast and impressive app that work on iOS, Android, BlackBerry, Kindle Fire, and more.
Learn more at http://sencha.com/touch
Tuesday, March 6, 2012
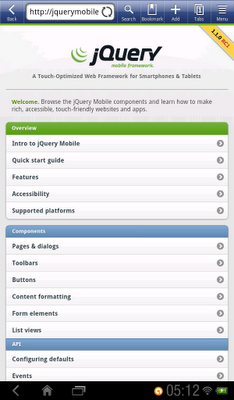
jQuery Mobile 1.1.0 RC1 released
Try it now! http://jquerymobile.com/demos/1.1.0-rc.1/
Monday, March 5, 2012
Implement slide effect using jQuery UI
<!DOCTYPE html>
<html>
<head>
<meta charset="UTF-8">
<title>Mobile-Web-App: jQuery UI - Slide Effect</title>
 <link rel="stylesheet" href="http://jqueryui.com/themes/base/jquery.ui.all.css">
 <script src="http://code.jquery.com/jquery-1.7.1.min.js"></script>
 <script src="http://code.jquery.com/ui/1.8.18/jquery-ui.js"></script>

<script type="text/javascript">

$(function() {
 $("#button").click(function() {
  var options = {}; //no options
  $("#object").effect("slide", options, "normal", callback);
 });

 function callback() {
  //It will be called after the effect is completed
 };
});

</script>
</head>
<body>
<div id="object">
<h1>Mobile-Web-App: jQuery UI - Slide Effect</h1>
<img src="http://goo.gl/BlQEX"></img>
</div>

<button id="button">Slide Effect</button>
</body>
</html>
Sunday, March 4, 2012
Implement bounce effect using jQuery UI
<!DOCTYPE html>
<html>
<head>
<meta charset="UTF-8">
<title>Mobile-Web-App: jQuery UI - Bounce Effect</title>
 <link rel="stylesheet" href="http://jqueryui.com/themes/base/jquery.ui.all.css">
 <script src="http://code.jquery.com/jquery-1.7.1.min.js"></script>
 <script src="http://code.jquery.com/ui/1.8.18/jquery-ui.js"></script>

<script type="text/javascript">

$(function() {
 $("#bouncebutton").click(function() {
  var options = {}; //no options
  $("#bounceobject").effect("bounce", options, "normal", callback);
 });

 function callback() {
  //It will be called after the effect is completed
 };
});

</script>
</head>
<body>
<div id="bounceobject">
<h1>Mobile-Web-App: jQuery UI - Bounce Effect</h1>
<img src="http://goo.gl/BlQEX"></img>
</div>

<button id="bouncebutton">Bounce Effect</button>
</body>
</html>
Saturday, March 3, 2012
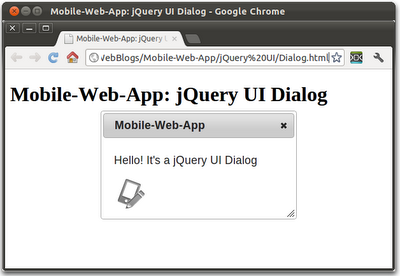
jQuery UI - Dialog
<!DOCTYPE html>
<html>
<head>
<meta charset="UTF-8">
<title>Mobile-Web-App: jQuery UI Dialog</title>

 <link rel="stylesheet" href="http://jqueryui.com/themes/base/jquery.ui.all.css">
 <script src="http://code.jquery.com/jquery-1.7.1.min.js"></script>
 <script src="http://code.jquery.com/ui/1.8.18/jquery-ui.js"></script>

<script>
 $(function() {
  $("#mydialog").dialog();
 });
</script>

</head>
<body>
<h1>Mobile-Web-App: jQuery UI Dialog</h1>

<div id="mydialog" title="Mobile-Web-App">
 <p>Hello! It's a jQuery UI Dialog</p>
 <img src="http://goo.gl/BlQEX"></img>
</div>

</body>
</html>
Friday, March 2, 2012
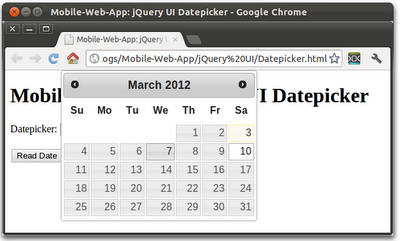
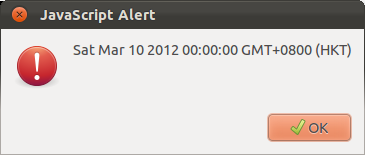
jQuery UI - datepicker
<!DOCTYPE html>
<html>
<head>
<meta charset="UTF-8">
<title>Mobile-Web-App: jQuery UI Datepicker</title>
 <link rel="stylesheet" href="http://jqueryui.com/themes/base/jquery.ui.all.css">
 <script src="http://code.jquery.com/jquery-1.7.1.min.js"></script>
 <script src="http://code.jquery.com/ui/1.8.18/jquery-ui.js"></script>

<script type="text/javascript">
function onloaded(){
 $("#datepicker").datepicker();
}

$(function() {
 $("#readdate").click(function() {
  var date = $("#datepicker").datepicker( "getDate" );
  alert(date);
 });
});
</script>
</head>
<body onload="onloaded();">
<h1>Mobile-Web-App: jQuery UI Datepicker</h1>

<p>Datepicker: <input type="text" id="datepicker"></p>
<button id="readdate">Read Date</button>
</body>
</html>
jQuery UI: Button

<!DOCTYPE html>
<html>
<head>
<meta charset="UTF-8">
<title>Mobile-Web-App: jQuery UI Button</title>

 <link rel="stylesheet" href="http://jqueryui.com/themes/base/jquery.ui.all.css">
 <script src="http://code.jquery.com/jquery-1.7.1.min.js"></script>
 <script src="http://code.jquery.com/ui/1.8.18/jquery-ui.js"></script>

<script>
 $(function() {
  $( "#mybutton" ).click(function() {
   alert("Button Clicked");
  });
 });
</script>
</head>
<body>
<h1>Mobile-Web-App: jQuery UI Button</h1>

<button id="mybutton">My Button</button>
</body>
</html>
Implement Resizable object using jQuery UI
<!DOCTYPE html>
<html>
<head>
<meta charset="UTF-8">
<title>Mobile-Web-App: jQuery UI resizable</title>

 <title>jQuery UI Resizable</title>

 <link rel="stylesheet" href="http://jqueryui.com/themes/base/jquery.ui.all.css">
 <script src="http://code.jquery.com/jquery-1.7.1.min.js"></script>
 <script src="http://code.jquery.com/ui/1.8.18/jquery-ui.js"></script>

<script type="text/javascript">
function onloaded(){
 $( "#resizable" ).resizable();
}


</script>
</head>
<body onload="onloaded();">
<h1>Mobile-Web-App: jQuery UI resizable</h1>

<div>
<img id="resizable" src="Mobile-Web-App.png"></img>
</div>

</body>
</html>
Pro jQuery
jQuery is one of the most popular and powerful JavaScript libraries available today. It's widely used to create rich user experiences and to simplify website and application development. It is the tool of choice for web developers everywhere and sets the standard for simplicity, flexibility and extensibility.
In Pro jQuery, seasoned author Adam Freeman explains how to get the most from jQuery by focusing on the features you need for your project. He starts with the nuts and bolts and shows you everything through to advanced features, going in depth to give you the knowledge you need. Getting the most from jQuery is essential to truly mastering web development.
What you’ll learn
- Understand the capabilities of jQuery and why it is special
- Use the core of jQuery to enrich HTML, including tables, forms and data displays
- Use jQuery UI to create rich and fluid user experiences
- Use rich interactions such as drag and drop, sortable data and touch sensitivity
- Use jQuery Mobile to create touch-enabled interfaces for mobile devices and tablets
- Extend jQuery by creating custom plugins and widgets
Who this book is for
This book is for working developers who want to learn about jQuery in detail. Quick refreshers of HTML and CSS are given to help you get up to speed, but a good working knowledge of the basics is assumed.
Table of Contents
- Putting jQuery In Context
- HTML Primer
- CSS Primer
- JavaScript Primer
- The jQuery Basics
- Managing the Element Selection
- Manipulating the DOM
- Manipulatng the Elements
- Working with Events
- Using jQuery Effects
- Refractoring the Example: Part I
- Using Data Templates
- Working with Forms
- Using Ajax: Part I
- Using Ajax: Part II
- Refractoring the Example: Part II
- Setting Up jQuery UI
- Using the Button, Progress Bar, and Slider Widgets
- Using the Autocomplete and Accordion Widgets
- Using the Tabs Widget
- Using the Datepicker Widget
- Using the Dialog Widget
- Using the Drag & Drop Interactions
- Using the Other Interactions
- Refactoring the Example: Part III
- Getting Started with jQuery Mobile
- Pages and Navigation
- Dialogs, Themes, and Layouts
- Buttons and Collapsible Blocks
- Using jQuery Mobile Forms
- jQuery Mobile Lists
- Refactoring the Mobile Example: Part IV
- Using the jQuery Utility Methods
- The jQuery UI Effects & CSS Framework
- Using Deferred Objects


